You can see pictures of these
in the gallery below. Searching by name on eBay is the best way to find
the kits that are no longer being made. Making baby dolls from kits is
very popular right now, so you should have no trouble at all finding a
kit if you want to make a baby.
See the
Rewigging ~ An Illustrated Guide for
information on where to purchase the wig and glue. Armatures can be
found at ArtDolls (wire armature)
or MiniWorld (plastic
armature) among many other places. (Do a web search for "doll armature"
and you will find several.) FiberFil can be found at any fabric or
craft store.
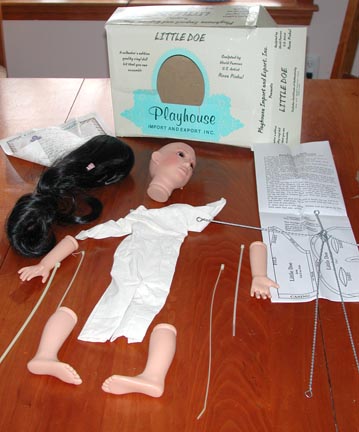
Step 1: Insert your armature into the
fabric doll body
If you want to use an
armature, just slip it into the doll body like you're putting a bodysuit
on a very slim body. In this case I used a wire armature.
Step 2: Slip the zip ties through the
casing in arms, legs and head
Zip ties are a nifty
invention. You can find them at hardware stores or Radio Shack (as cable
ties) but if you need more than are provided in the kit,
Prilly Charmin has good ones
with nice, small connectors. Thread the zip tie through the casings so
that the side with ridges is on the inside of the circle. Don't put the
end through the connector yet.
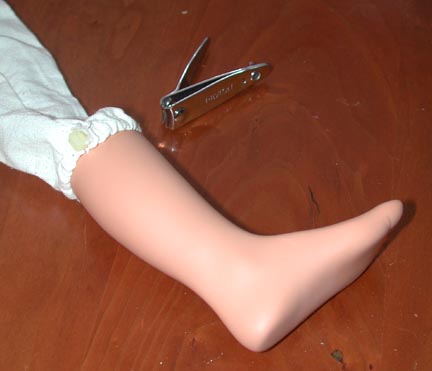
Step 3: Attach the limbs
If you are using an armature,
you often need to punch or enlarge the hole into the limb to fit the
armature in. If the hole is too large, you can fill the limb partially
with glue from a hot glue gun and set the armature into it. Let the glue
dry before proceeding after you attach the limbs if you do this. With
this kit I had to punch a whole in the neck to insert the armature (I
used a small awl from my husband's tool box, but scissors would have
worked too since the hole doesn't need to be neat) and I had to squeeze
the wire at the ends of the arms and legs to allow them to fit through
the existing holes.
Make sure you have your hands
and feet on the correct sides. Feet are easy but remember, thumbs up on
the hands.
Now just tighten the zip tie
so that it fits into the groove at the top of the limb. Don't tighten
the tie too tight -- you'll want to be able to rotate the hands and feet
a little when you pose her.

Clip off the end of the tie so
it's flush with the connector. If there's enough material, try to pull
the casing up and over the zip tie connector so it is covered and won't
scratch.
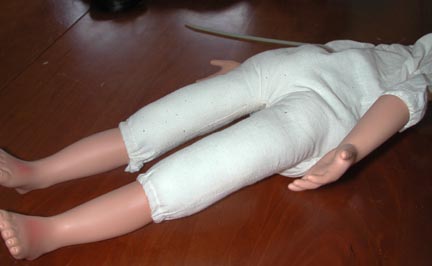
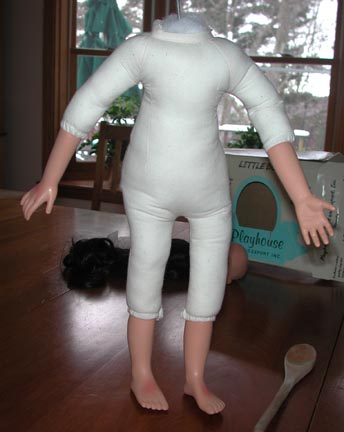
Step 4: Stuff the body
Now that you have all of the
limbs attached, you're ready to stuff the body. Here's what she looks
like at this point:
Stuff the legs first using a
tool to push the FiberFil down so it's firm. My favorite "high tech"
tool is a wooden spoon. Pack the FiberFil around the armature so that
it is surrounded. You don't want to be able to feel the armature as
you're playing with the doll. It takes a surprising amount of fill to
stuff a doll!

It's your choice how firm you
want your doll's body to be. Small wads of FiberFil are easier to work
down into the arms and legs but larger handfulls are easier in the torso
and cut down on the lumpiness. This doll was a bit of a challenge to
stuff smoothly because the body is rather thin muslin. The kit came with
a pattern for the doll body so you could make it in a higher quality
material if you want. You want the doll to be able to bend easily at the
tops of her legs and arms, so don't overstuff there. Make sure you get
the fill into important places like buttocks, chest and shoulders so
that the body looks natural.
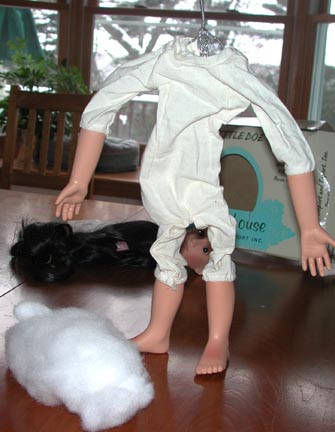
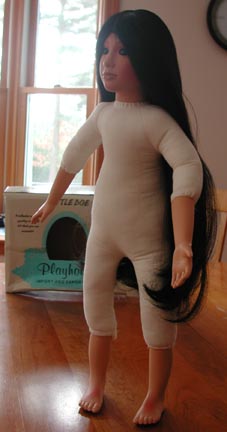
Stuffing is the most
time-consuming part of making the doll. As you can see, my poor,
headless doll is not totally smooth but I don't expect her to be running
around naked, so I declared her stuffing done.
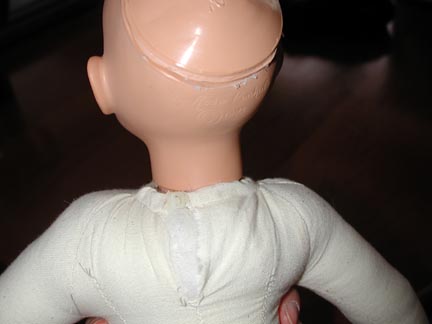
Step 5: Attach the head
Attach the head the same way
you attached the limbs. Make sure it's not too tight so she can move her
head from side to side. In this case, I needed to stitch a small opening
down the back seam after the head was on. This doll has a small neck so
the opening was made larger down the seam to allow it to open wider for
stuffing. While I had the needle threaded I took a few stitches to hold
the casing material over the zip tie connectors.
Step 6: Put on the wig
The wig is easy to put on a
brand new doll! Just flip the wig inside-out, apply some glue to the
inside of the wig cap in concentric circles, smear a bit to the edges,
then flip it onto the head. (See the
Rewigging article for more details.)
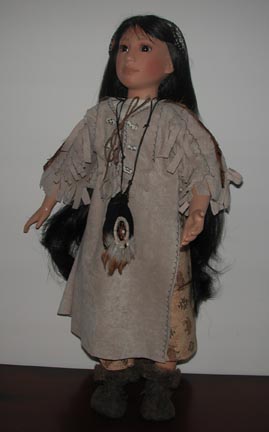
Step 7: Find something appropriate for her
to wear
My friend Devina Branch had
sent me a great Native American outfit in a swap. So, when I finished
Little Doe, I had just the right ensemble for her to wear, including all
the accessories.
And that's all there is to it!
Putting together kit dolls is a good way to become comfortable with
customizing dolls. Putting a wig on a doll who never had one is easier
than changing the wig on a doll. Since most kit dolls come with
non-articulated bodies, I have used the heads from kit dolls and matched
them with articulated bodies from other dolls, such as this Apple Valley
head with a Girls On the Go (an AG knock-off from Toys 'R Us) body. Once
you see how a doll goes together from scratch, it's easier to be brave
about changing something in another doll you own, even if it's swapping
out her whole body or taking her apart to add an armature or restringing
her.
Do you have any kit dolls?
Share some pictures and I'll add them to this gallery.
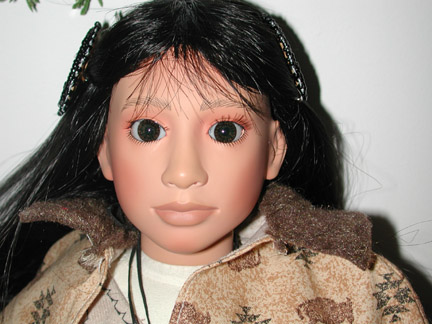
Apple Valley English Close Up
Playhouse: Peggy by Thelma Resch
Syndee Monique Unassembled
This Apple Valley doll has a Girls On the Go body instead of her white non-articulated one.
I gave this doll a Denise wig from Monique Trading Corp.
This Playhouse kit doll has a bit too much stuffing and needs to be slimmed down.
Her face is quite pretty.
This Syndee doll needs a little more stuffing.
This Syndee actually has one of the prettier faces. I kid you not.
This picture is courtesy of Elena of Bloomers*n*Bows (http://store.bloomers-n-bows.com) or bloomers*n*bows on eBay). Elena has several Syndee kits available for purchase.
This picture is courtesy of Elena of Bloomers*n*Bows (http://store.bloomers-n-bows.com) or bloomers*n*bows on eBay). Elena has several Syndee kits available for purchase.

This Apple Valley doll has a Girls On the Go body instead of her white non-articulated one.